« November 2004 | Inicio | January 2005 »

December 14, 2004

Get your Flash Lite Content submitted for the contest!

I guess you've heard it yet, but Macromedia has opened a contest to see who develops the coolest Flash Lite application. And they are going to give out a lot of cool and expensive prizes!

Here are the details of the contest:

http://www.macromedia.com/mobile/special/contest/

Obviously, you'll need to test your applications in a mobile device. You can request the Flash Lite player for your handset, sending an email to flashlite_contest@macromedia.com, sending also your handset model and IMEI.

If you want to know if your device is supported, you can take a look at:

http://www.macromedia.com/mobile/supported_devices/#tmobile

Hurry up!. The contest closes February 1, 2005. Show the world what you can do!

December 13, 2004

[OT] Laptop archeology

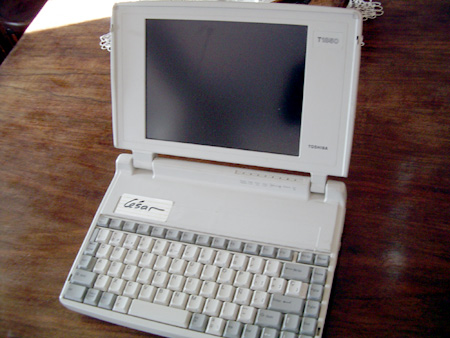
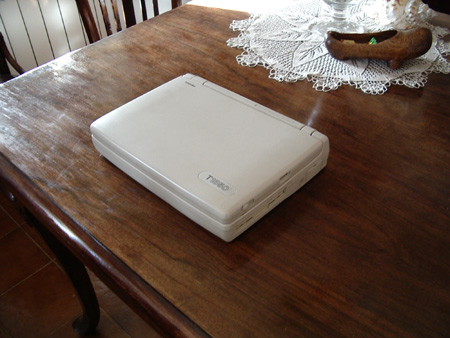
A few weeks ago I went to visit my parents, and my father told me that, when moving some old things, he had found the first laptop we had at home.

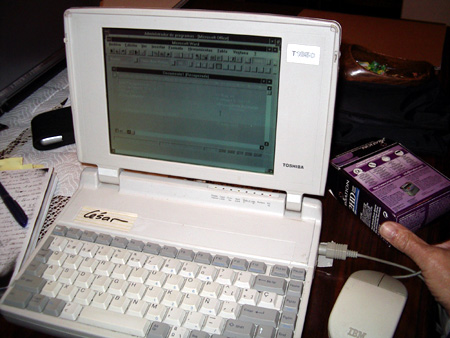
The laptop is a Toshiba T1850. It has a 386SX processor, 4MB of RAM, and a 120MB HDD.

toshiba1.jpg

toshiba2.jpg

I tried to switch it on, just to see what happens, and it worked!. It runs Windows 3.11 smoothly enough. I even typed a short article in Word!.

toshiba3.jpg

It was a nice surprise.

[PPC] The model-view-controller architecture applied to a pocket pc application

This is a extremely simple application, but it can be an example of how to develop pocket pc applications using and adapting the movel-view-controller architecture. And I’ve also used the Delegate class!.

Well, I was going to play scalextric with some friends, and we found that the lap counter was broken, so I thought: "sure, we can use a pencil and a paper sheet, but, this is a job for my pocketpc!".

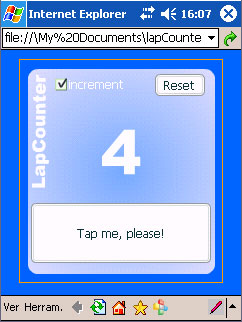
So, I’ve built a lap counter. Here’s an screenshot:

lapcounter_ok.jpg

The application is extremely simple. But it’s implemented using the model-view-controller architecture, and just for the shake of testing, using the V2 UI components, instead of those included in the PocketPC CDK . A year has passed since my last pocketpc application, and I still remember how dificult was to work using those components.

First of all, I’m, using my own event system. I’ve used it in other posts before, and the classes are included in the source code that you can download below, but long story short, there is a base class ( EventSource ) that implements all the methods that any event source needs. The interface of that class is IEventRegister. I also use a hashmap, wich is also included.

Back to LapCounter. The components and output textfield are on the stage. Those graphic assests will be managed by the View ( CounterView.as )

import mx.utils.Delegate; import net.designnation.lapcounter.LapCounterController class net.designnation.lapcounter.CounterView { private var timeline : MovieClip; private var controllerVal : LapCounterController; function CounterView( timeline: MovieClip ) { this.timeline = timeline; this.initView( ); } private function initView( ) { var viewRef: CounterView = this; this.timeline.resetButton.label= "Reset"; this.timeline.resetButton.addEventListener( "click", Delegate.create( this, onResetBTClicked ) ); this.timeline.countButton.label = "Tap me, please!"; this.timeline.countButton.addEventListener( "click", Delegate.create( this, onCountBTClicked ) ); this.timeline.switchCB.setStyle( "color", 0xFFFFFF ); this.timeline.switchCB.label="increment"; this.timeline.switchCB.addEventListener( "click", Delegate.create( this, onCheckBoxClicked ) ); this.timeline.switchCB.selected = true; } public function set controller( controllerRef: LapCounterController ) { this.controllerVal = controllerRef; } public function onCounterChanged( param: Object ) { this.timeline.result.text = param.value; } public function onCountBTClicked( ) { this.controllerVal.screenClicked( ); } public function onResetBTClicked( ) { this.controllerVal.reset( ); } public function onCheckBoxClicked( ) { this.controllerVal.incFlagChanged( ); } }

This class sets the labels of the buttons and checkbox, and uses the Delegate class to set the components event handlers. So, when countButton ( the big button ) is clicked, the event will be listened by the method "onCountBTClicked" of the CounterView class.

As you could see, there is one method to update the screen output ( a textfield named result ), and three diferent methods to handle the user input ( one for each component, thanks to delegation ). When one of those methods is executed, it executes a public method of the controller.

I know the view can, and maybe should, attack the model directly to change its data, but that’s something I don’t like. I just prefer to do it through the controller.

But where’s the controller?. The whole application is initialized in the fla’s first frame, thanks to this code:

import net.designnation.lapcounter.* var controller: LapCounterController = new LapCounterController( new CounterView( this ) );

So, the controller is initialized, and receives and instance of the view. Let’s take a closer look at the controller.

import net.designnation.lapcounter.* class net.designnation.lapcounter.LapCounterController { private var lapCounter : ILapCounterActions; private var counterView : CounterView; private var timeline : MovieClip; function LapCounterController( view: CounterView ) { this.counterView = view; this.counterView.controller = this; this.initCounter( ); } private function initCounter( ) { this.lapCounter = new LapCounter( ); this.lapCounter.registerEvent( this.counterView, "onCounterChanged" ); } public function screenClicked( ) { this.lapCounter.addLap( ); } public function incFlagChanged( ) { this.lapCounter.setInc( ); } public function reset( ) { this.lapCounter.reset( ); } }

The controller holds a reference to the view, and creates the model ( LapCounter ). It doesn’t hold a reference to the model itself, but to the model’s interface ( IlapCounterActions ). But we’ll go back to the model later.

When the model is created, the controller register the view as an event listener of the model. So, when the model changes its internal state ( the data ), it fires an event that is listened by the view.

There are also three methods ( screenClicked, incFlagChanged, and reset ) that are the ones that the view uses to change the model.

And, finally, the model ( LapCounter.as ).

import net.designnation.events.EventSource import net.designnation.lapcounter.ILapCounterActions class net.designnation.lapcounter.LapCounter extends EventSource implements ILapCounterActions { private var actualLaps : Number; private var incFlag : Boolean; function LapCounter( ) { this.actualLaps = 0; this.incFlag = true; } public function addLap( ) { var multiplier: Number = ( this.incFlag )? 1: -1; this.actualLaps+= 1* multiplier; if ( this.actualLaps< 0 ) this.actualLaps = 0; updateView( ); } private function updateView( ) { fireEvent( "onCounterChanged", { value: this.actualLaps } ); } public function setInc( ) { this.incFlag = !this.incFlag; } public function reset( ) { this.actualLaps = 0; updateView( ); } }

This class extends EventSource ( so, it inherits the event handling methods ), and implements an interface ( ILapCounterActions ). That interface will be the reference of the model that is hold by the controller. So, we could change the model without affecting the rest of the application ( if the new model implements the same interface, of course ). That interface also extends the event registration interface.

The model is not very complex ( the whole application isn’t ). It just holds the counter, and a flag to know if the counter increments or decrements. And there’s also a method to update the view ( updateView ), that fires the event that is listened by, you guessed it, the view itself.

And that’s all. Just publish the application as flash 6, create an html to hold it, and you can safely play scalextric!.

And, of course, the source code: download it here

December 12, 2004

[J2ME] First Application: Dice

It's time to develop a MIDlet. I've started with a simple one, just a dice ( a small cube marked on each side with from one to six dots ), without any animation, but that just shows the basic architecture of a MIDlet, and a bit of low-level key management.

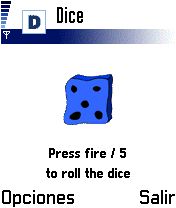
Two screenshots:

Cap1.jpg Cap2.jpg

The application is not very complex. It shows one side of the dice ( it's selected randomly ), and each time the user presses the fire button or the "5" key, it just generates a new random integer between 1 and 6, and shows the appropiate side of the dice.

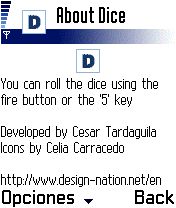
There's also an "about" screen, that shows some info about the application.

I've separated ( just to improve encapsulation ) the generation of the random number into a class ( DiceController.java ). Here's the code:

package net.designnation.j2me.dice; import java.util.Random; public class DiceController implements IDiceActions{ private static int LOWER_LIMIT = 1; private static int UPPER_LIMIT = 6; private Random random; DiceController( ) { random = new Random( ); } public int rollDice( ) { return 1+ Math.abs( random.nextInt() % UPPER_LIMIT ); } }

This class implements an interface ( IDiceActions ):

package net.designnation.j2me.dice; public interface IDiceActions { int rollDice( ); }

Why does DiceController implements an interface?. Because that interface is the reference that the MIDlet will have of this class. But we'll see it later.

Every J2ME application must be built around a class that extends MIDlet. That class ( at least in this example ) will have the responsibility to manage all the high-level button handlers ( it will handle the main application buttons, those asigned to the phone's soft buttons ). But in this example, I want to track also some of the phone's keys ( fire and "5" ), so I will need also to write a class to manage them. And that class must be a Canvas.

So, let's take a look at the main class:

package net.designnation.j2me.dice; import javax.microedition.lcdui.Command; import javax.microedition.lcdui.CommandListener; import javax.microedition.lcdui.Display; import javax.microedition.lcdui.Displayable; import javax.microedition.midlet.MIDlet; import javax.microedition.midlet.MIDletStateChangeException; public class Dice extends MIDlet implements IExitActions, CommandListener { private Display display; private DiceCanvas diceCanvas; private Command exitCommand = new Command("Exit", Command.EXIT, 1); private Command backCommand = new Command( "Back", Command.BACK, 2 ); private Command aboutCommand = new Command( "About", Command.SCREEN, 5 ); protected static String APP_NAME = "Dice"; public Dice() { super(); diceCanvas = new DiceCanvas( ); diceCanvas.addCommand( exitCommand ); diceCanvas.addCommand( aboutCommand ); diceCanvas.setCommandListener( this ); } protected void startApp() throws MIDletStateChangeException { display = Display.getDisplay( this ); display.setCurrent( diceCanvas ); } protected void pauseApp() { } protected void destroyApp( boolean arg0 ) { notifyDestroyed( ); } public void exitApp( ) { destroyApp( true ); } public void commandAction (Command c, Displayable d) { if (c == exitCommand ) { exitApp( ); } if( c == aboutCommand ) { HelpScreen helpScreen = new HelpScreen( ); helpScreen.addCommand( backCommand ); helpScreen.setCommandListener( this ); display.setCurrent( helpScreen ); } if( c == backCommand ) { display.setCurrent( diceCanvas ); } } }

This class extends MIDlet ( that's mandatory ), and like every midlet, it inherits three methods ( startApp, pauseApp, destroyApp ). I've also created three commands ( exitCommand, aboutCommand, backCommand ), that will be asigned to the soft buttons.

When this class is instantiated, it creates an instance of DiceCanvas ( we'll take a look at this class later, but it extends Canvas ). It also registers itself as a listener of the commands that are passed to DiceCanvas.

public Dice() { super(); diceCanvas = new DiceCanvas( ); diceCanvas.addCommand( exitCommand ); diceCanvas.addCommand( aboutCommand ); diceCanvas.setCommandListener( this ); }

When the application starts ( and the method startApp is executed ), the canvas is setted as the current display.

display = Display.getDisplay( this ); display.setCurrent( diceCanvas );

The method commandAction handles the high-level interaction. When the user selects "about", it creates and instance of HelpScreen, and sets it as the current display.

if( c == aboutCommand ) { HelpScreen helpScreen = new HelpScreen( ); helpScreen.addCommand( backCommand ); helpScreen.setCommandListener( this ); display.setCurrent( helpScreen ); }

Now, let's take a look at DiceCanvas:

package net.designnation.j2me.dice; import java.io.IOException; import javax.microedition.lcdui.Canvas; import javax.microedition.lcdui.Font; import javax.microedition.lcdui.Graphics; import javax.microedition.lcdui.Image; public class DiceCanvas extends Canvas { private IDiceActions dice; DiceCanvas( ) { dice = new DiceController( ); } protected void paint( Graphics g ) { Font font = null; Image diceIcon = null; g.setColor( 0xffffff ); g.fillRect( 0, 0, getWidth( ), getHeight( ) ); g.setColor(0); font = Font.getFont( Font.FACE_PROPORTIONAL, Font.STYLE_BOLD, Font.SIZE_SMALL ); g.setFont( font ); try { String imageName = "/resources/icon"+ dice.rollDice( ) + ".png"; diceIcon = Image.createImage( imageName ); } catch (IOException e) { throw new RuntimeException ("Unable to load diceIcon: "+e); } g.drawImage( diceIcon, getWidth( )/ 2, 30, Graphics.TOP | Graphics.HCENTER ); g.drawString ("Press fire / 5", getWidth () / 2, getHeight () -30, Graphics.HCENTER | Graphics.BASELINE); g.drawString ("to roll the dice", getWidth () / 2, getHeight () -10, Graphics.HCENTER | Graphics.BASELINE); } public void keyReleased( int keyCode ) { if ( getGameAction( keyCode ) == FIRE ) { repaint( ); } } }

Do you remember the interface implemented by DiceController?. Now, the reference to DiceController is typed IDiceActions, so DiceCanvas only knows that there's a method called rollDice that returns a number, but it doesn't know the class that implements it.

private IDiceActions dice; DiceCanvas( ) { dice = new DiceController( ); }

The paint method is inherited from Canvas, and is executed every time we want to refresh the display. So there, we draw the text and icons we want to show. The display is cleared with every refresh, which is not very efficient, but that will be changed in the next version. we just paint a different icon with every refresh, depending on the result of rollDice( ).

try { String imageName = "/resources/icon"+ dice.rollDice( ) + ".png"; diceIcon = Image.createImage( imageName ); }

We also handle the keyboard input, through the method "keyReleased".

public void keyReleased( int keyCode ) { if ( getGameAction( keyCode ) == FIRE ) { repaint( ); } }

And finally, there's an "about" screen, which extends Form, and that will contain some info about the application.

package net.designnation.j2me.dice; import java.io.IOException; import javax.microedition.lcdui.Form; import javax.microedition.lcdui.Image; import javax.microedition.lcdui.ImageItem; public class HelpScreen extends Form { HelpScreen( ) { super( "About "+ Dice.APP_NAME ); try { ImageItem logo = new ImageItem( "", Image.createImage( "/resources/icon.png"), ImageItem.LAYOUT_CENTER | ImageItem.LAYOUT_NEWLINE_BEFORE | ImageItem.LAYOUT_NEWLINE_AFTER, "" ); append( logo ); } catch (IOException e) { throw new RuntimeException ("Unable to load Image: "+e); } append("You can roll the dice using the fire button or the '5' key\n\nDeveloped by Cesar Tardaguila\nIcons by Celia Carracedo\n\nhttp://www.design-nation.net/en"); } }

It's just a simple Form, that contains an icon and a text. Nothing special.

There are some things that have to be improved. First of all, the whole application is a bit heavy ( about 18 Kb ), due to the icons used to represent the Dice. So, in the next version, I'll try to draw those icons using the drawing API. I'll also try to add some animation, just to make it as similar to flash as possible, so I'll have to introduce some Thread management. And the way the display is refreshed should be improved too.

There's still a lot of work to do, but now we have a starting point. But that will be in the next post.

If you want to download the application:

http://www.design-nation.net/j2me/dice.jad

http://www.design-nation.net/j2me/dice.jar

And the source code and icons:

http://www.design-nation.net/j2me/dice_source.zip

I've just tested it on my Nokia N-gage, but if you test it on another device, please let me know if there was any problem

Enough for a Sunday!

December 02, 2004

Some practical benefits of OOP

If you're an experienced developer, I'm afraid you won't find this post interesting.

But, if you're starting to learn about object oriented programming, maybe you've heard about its benefits, about how an object oriented approach can help in developing and maintaining your applications. But, is it true?. Does oop really make our work easier?.

Let's suppose that we have to develop a new website, and that this website, when launched, prompts the user with a form just to make him / her enter his / her username and password and, when the "send" button is clicked, sends the data to a server side script.

I can think of three different ways to solve the problem.

1.- The "old" way: We just place in the stage the two textfields we are going to need and the movieclip ( or button ) for the "send" button. Then, we select the button, hit F9, and write a script like the following:

on( release )
{
_root.getURL( "myscript.php", "_self", "GET" );
}

Work done!. We've solved the problem in two minutes. That's good!.

But, what happens if we have to implement a prompt like this in all the websites we develop?. We'll have to copy the code and paste it in every single button contained in every single fla we work on. And what happens if we have to change the server side script url?. We'll have to open all the fla files we've made before, and start changing all the scripts in all the "send" buttons.

So, the development time has been too short, but it can be a hell to maintain.

2.- We can put all the code in a frame, or even better, in a *.as file.

Let's think again about the example we used before. If we assign an instance name to the button ( "sendBtn", for instance ), we can write an as file with the following code:

sendBtn.onRelease = function( )
{
_root.getURL( "myScript.php", "_self", "GET" );
}

Now, we'll only have to include that *.as file in all our projects and we're done!. If we must change the url of the server side script, we just have to change it in the as file.

But, what happens if the server side script is not the same for every project?. One client might need an asp, another one a jsp... And what happens if we have to do something with the login and password values before sending them ( like, for instance, write then into a SharedObject )?.

Now our code is easier to maintain, but it has lost a lot of flexibility.

3.- The OOP solution. Why don't we break the whole process into small pieces ( or entities ), and make each one of them responsible of a single task ( and only one task )?. Why don't we make those entities independent enough, so when we change any of them, that change does not affect any other entity?. And even better, whay don't we implement those entities in a way that one entity doesn't know anything about how another one works?

Suppose we have one of those entities responsible of telling the "send" button that when clicked, it must fire an event that contains the user and password data. Suppose we have another entity that is waiting for data ( any data, in any format ), just to push that information to a third entity that just sends the information it receives to a server side script ( whose url can also be a parameter ).

Well, each one of those entities is a class. So, we'll implement a class to manage the user input, another one to manipulate that input data, and a third one to send any data to a server.

What happens if the url of the server side script changes?. Not much, that url is just a parameter of the third class ( the one that sends everything it receives to a server side script ). What if we need to perform any calculation before sending the data?. Not much. We just perform that operation before sending anything to the third class.

So, now, our program is easier to maintain. There's a lot of common code that can be used in many different websites. And we've also divided the functionality into many small pieces. So, from now one, it will be easier, for instance, to solve any possible bug ( just because we know where to look for its causes ). That's called modularity.

The versatility is also improved. The application 's behaviour can be changed without changing code ( we can make it send data to an jsp, a php,... ).

It's also easier to add new functionalities. We just have to add new pieces to our application. That's called scalability.

We've also said that the classes hide the details of how they work to other classes. So, if the way a class does its work must change, it doesn't affect the other ones. That's called encapsulation.

So, if we use the third solution, we'll have to write more code than if we use the first one. But, that brings us a lot of advantages. And the biggest one is that our applications will be easier to adapt to the changing requirements. And you can be sure, the requirements of a project will change. And not once.

Thanks to Ignacio Caballero for giving me the idea for this post.
December 01, 2004

[J2ME]: Random class

Have you ever worked as part of a team where all the other developers are Java experts? How many times have you heard "Flash is very strange, there are a lot of quirks"?.

Well, Java also has its own quirks, like, for instance the Random class. Maybe this is obvious for all the experienced J2ME developers out there, but it took me almost an hour of my work to notice that the Random class ( java.util.Random ) that is part of the MIDP 1.0 is different from the "standard" J2EE Random class.

And the difference ( and my problem ) came because although there is a nextInt( ) method, there's not a nextInt( int i ) method in the J2ME class.

So, what if I need to generate a random number smaller than a given value?.

Easy:

Random random = new Random( ); int randomNumber = Math.abs( random.nextInt() % UPPER_LIMIT );

where UPPER_LIMIT is a constant, whose value is the upper limit of the random value.